
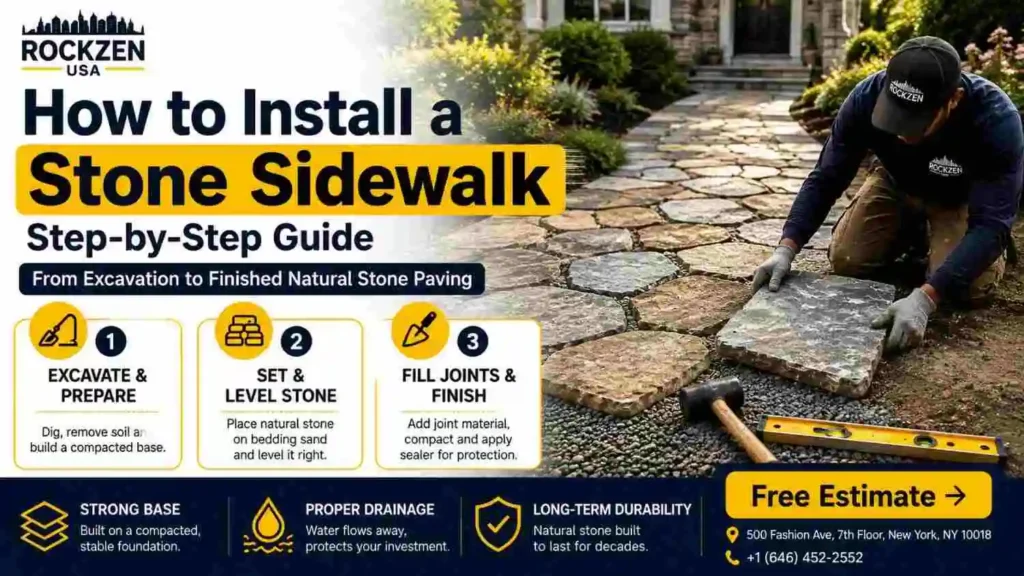
You have that patch of dirt path that shifts to mud every spring. Or the concrete walkway that cracked, patched, and cracked again. Rockzen Construction can help with a professionally installed stone sidewalk.
Quick Answer: Install a Stone Sidewalk in 9 Steps
- Choose your stone type based on climate and use
- Mark the layout and call 811 before digging
- Excavate 6 to 12 inches deep depending on climate
- Compact the soil and lay landscape fabric
- Add crushed stone base in 2-inch lifts, compacting each
- Spread and level a 1-inch bedding sand layer
- Set stones in your chosen pattern from a fixed edge
- Fill joints with polymeric sand, stone dust, or mortar
- Compact one final time and seal the surface
What Is a Stone Sidewalk and Why Choose Natural Stone?
A stone sidewalk is a walkway built from natural quarried stone. Common stone types include flagstone, bluestone, granite, limestone, and slate. Each stone type has a different look, weight, and cost. Natural stone lasts significantly longer than concrete or manufactured pavers.
Stone sidewalks handle weather better than most alternatives. They look intentional and rich in a way concrete cannot match. They cost more upfront and take more skill to install correctly.
Natural Stone Compared to Concrete Pavers
Natural stone is quarried from the earth in raw slabs. Concrete pavers are manufactured units cast in molds. Stone carries more visual character and lasts longer under freeze-thaw exposure. Concrete pavers cost less and install faster because of uniform sizing.
Natural Stone Compared to Brick
Brick is fired clay in a uniform manufactured shape. Stone is irregular, quarried, and never perfectly repeatable. Brick offers a traditional look at lower cost. Stone offers a natural look that never comes twice the same way.
Dry-Laid or Mortar-Set Installation
Dry-laid stone sits on crushed stone and sand. No mortar bonds the stones together. Mortar-set stone bonds permanently to a concrete base. Dry-laid flexes with freeze-thaw movement. Mortar-set locks in place but cracks if the base moves.
What Types of Stone Work Best for a Sidewalk?
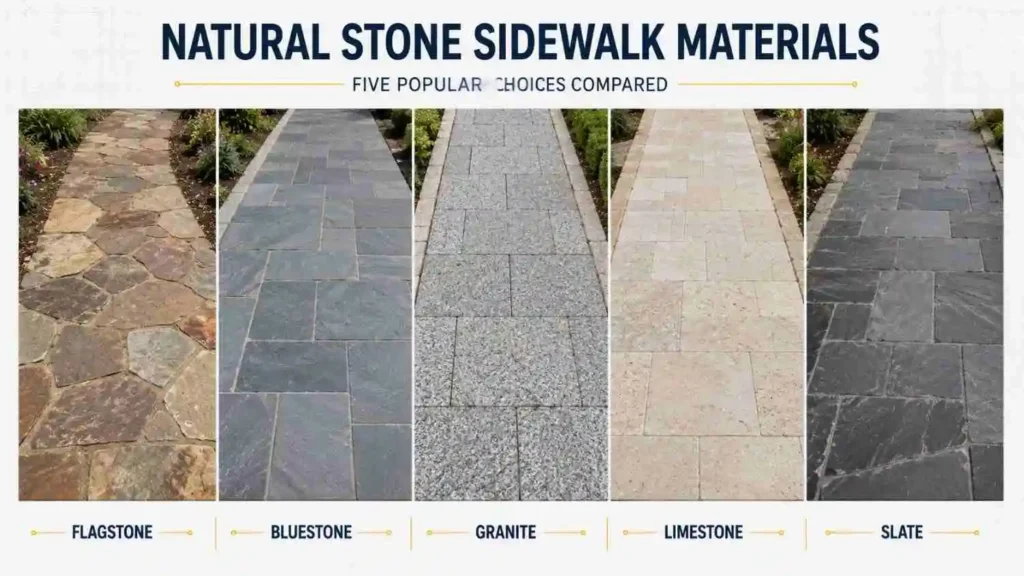
Five natural stone types dominate residential sidewalk projects. Each has a different price, weight, freeze-thaw performance, and look. Choosing the right one comes down to climate, budget, and visual preference.
Flagstone
Flagstone is any flat stone quarried in irregular shapes. Common flagstone varieties include sandstone, quartzite, and limestone. Flagstone costs $15 to $30 per square foot for materials. It suits garden paths and casual residential walkways best.
Bluestone
Bluestone is a dense sedimentary stone quarried in the northeastern United States. It handles freeze-thaw cycles exceptionally well. Bluestone costs $18 to $35 per square foot for materials. It suits front walkways and formal entrance paths.
Granite
Granite is the hardest common sidewalk stone. It resists freeze-thaw, salt, and heavy use for a century or more. Granite costs $20 to $40 per square foot for materials. It suits high-traffic walkways and driveways where longevity matters most.
Limestone
Limestone offers a lighter color palette than bluestone or granite. It costs $12 to $25 per square foot for materials. Limestone weathers to a softer patina over decades. It suits residential walkways in milder climates where salt exposure is limited.
Slate
Slate splits into thin flat pieces with a distinctive layered look. It costs $15 to $30 per square foot for materials. Slate handles freeze-thaw well but is more prone to chipping under impact. It suits garden paths and low-traffic walkways.
Stone Thickness by Use Case
Standard sidewalk stone runs 1 to 2 inches thick. Thicker stones handle vehicle traffic on a driveway. Thinner stones are set in mortar over a concrete base. Dry-laid installations need thicker stones for stability under load.
How Do You Plan a Stone Sidewalk Layout?
Planning starts with measuring the walkway area. Stone type, joint style, and total square footage all factor in. Confirm every detail before ordering material. Stone orders are heavier and more expensive to reorder than pavers.
Measuring the Walkway Area
Measure the full length and width of the planned walkway. Multiply for total square footage. Add 15 percent for cuts and waste because irregular stone produces more offcuts. Add 20 percent for curved layouts.
Width Recommendations
A residential stone sidewalk should allow comfortable two-person passage. Thirty-six inches is a common minimum width. An accessibility-friendly path needs at least 36 inches with a wider turnaround area.
Material Estimation and Waste Allowance
Order stone based on total square footage plus waste allowance. Order base material and bedding sand separately. Reordering stone weeks later often means mismatched color batches. Buy from one quarry lot for consistency.
What Tools and Materials Do You Need for Stone Sidewalk Installation?
Stone sidewalk installation needs hand tools, a plate compactor, and lifting equipment. Stone is significantly heavier than paver or brick. Having help lined up before starting matters more here than on smaller units.
Hand Tools and Layout Equipment
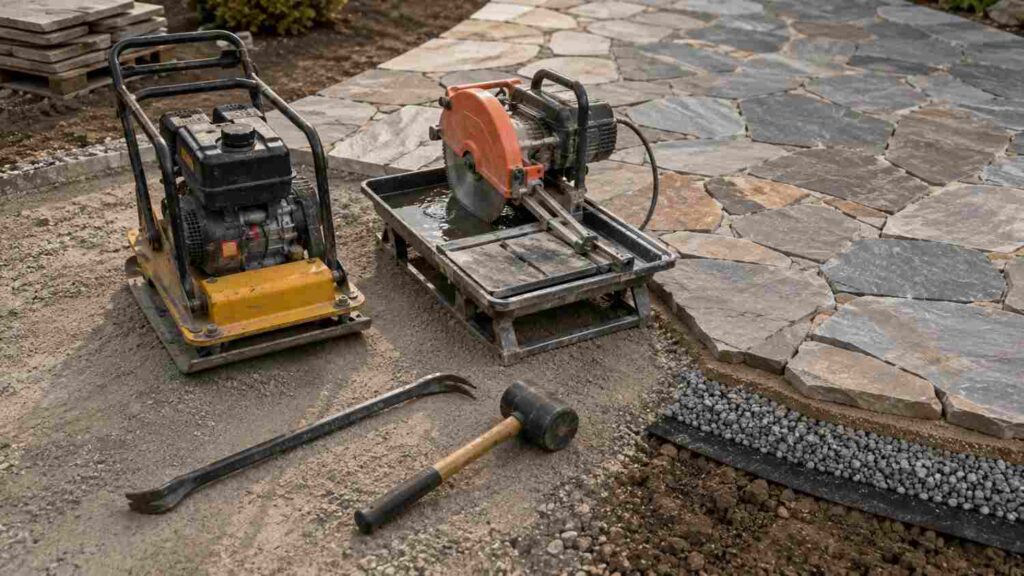
A shovel, rake, and tape measure handle excavation and layout. A chalk line and stakes mark the walkway edges. A two-foot level checks slope. A rubber mallet seats stones without cracking them.
Plate Compactor and Masonry Saw
A plate compactor compacts the crushed stone base and finished surface. Rent one for a single project. A masonry saw or angle grinder with a diamond blade cuts stones to fit edges and curves.
Lifting and Moving Tools
A pry bar and stone tongs help lift heavy pieces. A wheelbarrow moves smaller stones. Larger flagstone slabs may need two people to place safely.
Base, Bedding, and Joint Materials
Crushed stone forms the base layer. Bedding sand or stone dust creates the setting surface. Polymeric sand, regular stone dust, or mortar fills the joints depending on the installation method chosen.
How Do You Excavate the Area for a Stone Sidewalk?
Excavation means digging soil to the correct base depth for your climate and stone weight. Get the depth right and the sidewalk stays level for decades. Get it wrong and freeze-thaw will lift the stones within a season or two. Mark the walkway edges first, then dig to the depth your climate needs.
Base Depth by Climate and Stone Weight
Warm-climate installations need 4 to 6 inches of excavation. Cold-climate installations need 8 to 12 inches. Heavier granite and thick bluestone slabs add another inch or two. Cold-climate soil freezes 12 to 18 inches deep in a hard winter. Sizing base depth to local frost depth is the safest approach.
Marking and Layout
Outline the walkway edges with stakes and string. Mark curves with a garden hose for a natural line. Spray paint the final cut line before digging.
Calling 811 Before You Dig
Call 811 before any digging begins. No exceptions. The call is free and connects to local utility locators. Hitting a gas, electric, or water line turns a weekend project into a legal and safety emergency.
Excavating to the Planned Depth
Dig down to the depth set for your climate and stone weight. Keep the excavation consistent across the length. A flat-bottomed trench makes base installation easier and the finished slope more predictable.
Soil Preparation
Compact the exposed soil before adding base material. Plan for roughly a quarter-inch drop per foot sloping away from any building. This slope moves water off the walkway before it pools.
How Do You Prepare and Compact the Base?
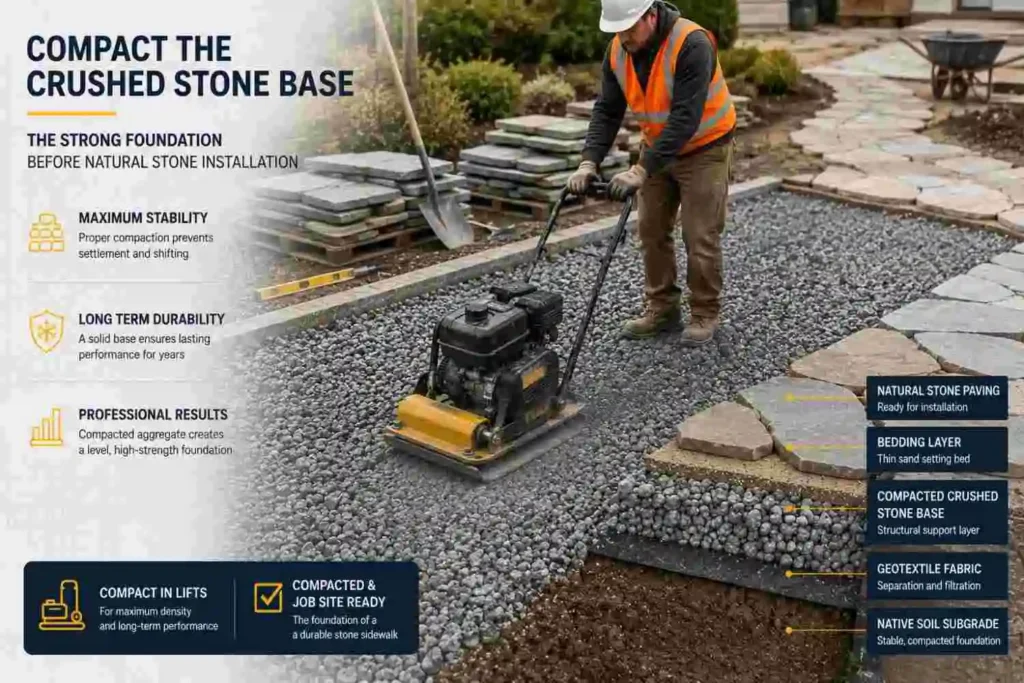
The crushed stone base is the single most important layer. Add it in lifts, no more than 2 inches at a time. Compact each lift before adding the next. Skipping this step is the top cause of stone sidewalk failure — and no joint material or edge treatment can fix a bad base.
Choosing the Right Crushed Stone
Angular crushed stone locks together better than rounded gravel. Three-quarter-inch minus stone is standard for sidewalk bases. It compacts tightly and drains well. Rounded pea gravel is the wrong choice because it shifts under load.
Installing the Base in Lifts
Spread crushed stone in thin layers called lifts. Each lift should be 2 inches or less before compacting. Thicker lifts compact unevenly and leave weak spots underneath.
Compacting Each Lift
Run the plate compactor over each lift in overlapping passes. Two or three passes per lift is typical. A properly compacted base barely moves underfoot. You should feel almost no give when walking on it.
Landscape Fabric Under Stone
Landscape fabric separates soil from the crushed stone base. It prevents soil from mixing upward into the base. It also blocks most weed growth from below.
How Do You Design Drainage for a Stone Sidewalk?
Proper drainage means water moves off the walkway, not under it. Grade the crushed stone base with a slight slope. A quarter-inch drop per foot is the standard target. Without drainage, water pools under the stones and causes freeze heave.
Slope and Grade for Runoff
Slope the walkway surface away from the house or any building. A quarter-inch drop per foot moves water effectively. Check this slope with a level during base installation, not after stones are set.
Drainage in Freeze-Thaw Climates
Cold-climate soil holds water longer than sandy soil. A thicker crushed stone base improves drainage in clay-heavy soil. Trapped water is what turns a minor freeze into a heaved sidewalk.
Edge Drainage Considerations
Water can collect along walkway edges over time. A French drain alongside the walkway carries this water away. This matters most where a walkway sits below the surrounding grade.
How Do You Set Stones on the Sidewalk?
Setting stones means placing each piece onto the bedding sand layer, level with the pieces around it. The setting stage is where the finished walkway takes shape. It also determines whether every stone stays flush over the years or one sticks up and catches a toe. Start from a fixed edge or corner. Work outward, level each stone individually, and adjust the bedding sand underneath as needed.
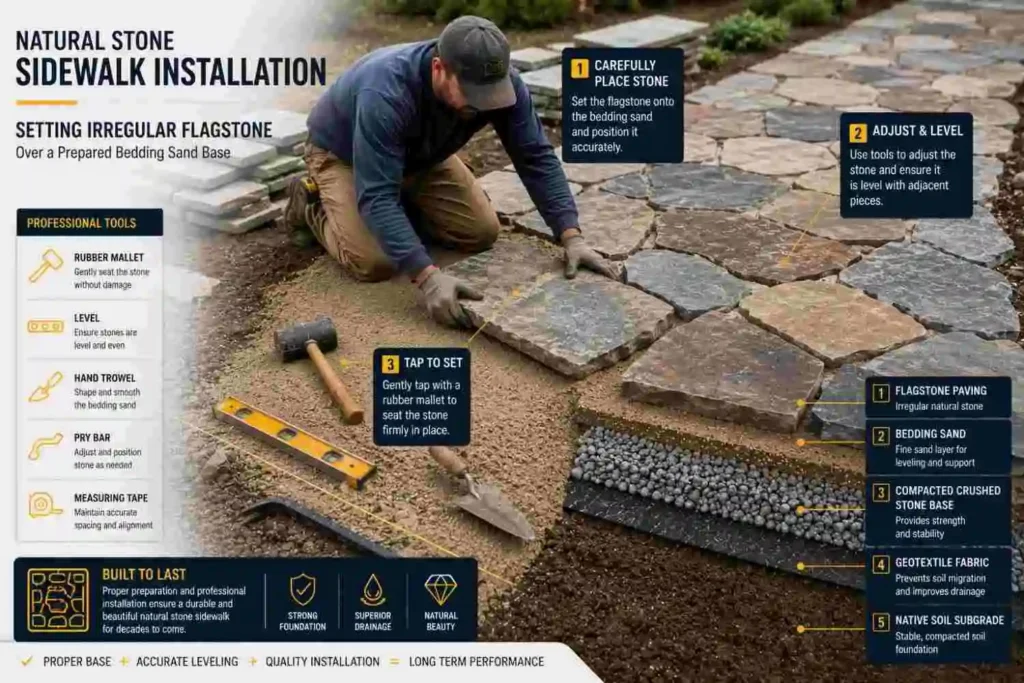
Step 1. Dry-Fit the Layout
Set stones out on the ground first before installing them. This lets you plan the pattern, cuts, and joint spacing. Move heavy stones as few times as possible.
Step 2. Spread and Screed the Bedding Sand
Lay a 1-inch bedding sand or stone dust layer over the compacted base. Screed it flat using a straight board pulled across guide rails. Never walk on the screeded sand before setting stones.
Step 3. Set the First Stone
Place the first stone against your reference edge. Seat it firmly with a rubber mallet. Check level in both directions.
Step 4. Fill In the Pattern
Continue the pattern across the walkway. Keep joints consistent for a regular look, or vary them for a natural random-fit pattern. Cut stones to fit edges and curves as you go.
Step 5. Adjust Level as You Go
Add or remove bedding sand under each stone to reach level. Check level every few stones with a straight board across multiple pieces. Adjusting early is faster than fixing later.
What Stone Sidewalk Patterns Work Best?
Stone sidewalk patterns depend on the stone type and the visual goal. Irregular random-fit patterns look natural. Cut-stone patterns look formal and clean. Both need careful planning during layout.
Random-Fit Flagstone Pattern
Random-fit uses irregular flagstone pieces in a natural puzzle pattern. Joints vary in width for an organic look. This pattern suits garden paths and casual walkways.
Ashlar Pattern With Cut Stone
Ashlar uses rectangular cut stones in a mixed-size grid. Joints are consistent and clean. This pattern suits front walkways and formal entrance paths.
Running Bond Pattern
Running bond lays cut stones in offset rows. It suits uniform bluestone or granite pieces cut to consistent sizes. This is the fastest cut-stone pattern to install.
Crazy Paving Pattern
Crazy paving uses broken flagstone pieces with wide joints. Mortar or ground cover often fills the joints. This pattern suits rustic garden paths and cottage settings.
How Do You Fill the Joints Between Stones?
Joint material locks stones together and blocks weed growth. Three options work for most residential stone sidewalks. The right choice depends on the installation method and the look you want.
Polymeric Sand for Dry-Laid Stone
Polymeric sand contains a binder that hardens when wet. Sweep it into dry joints, then activate with water. It resists washout better than regular sand. This is the most common joint material for dry-laid stone.
Stone Dust for Natural Look
Stone dust matches the color of the stone above it. It fills joints for a natural, muted appearance. Stone dust washes out faster than polymeric sand and needs more upkeep.
Mortar for Formal or Mortar-Set Stone
Mortar joints are rigid and permanent. They suit mortar-set installations over concrete bases. Mortar cracks if the base moves, so it needs a solid subgrade.
Ground Cover for Crazy Paving
Low-growing plants like creeping thyme or moss fill wide joints in crazy paving. This creates a soft, living walkway surface. Ground cover needs regular maintenance and works best in shaded areas.
How Do You Install Edge Restraints for a Stone Sidewalk?
Edge restraints hold the outer stones in place. Without them, the whole field can spread over time. Restraints go in during installation, not after. Retrofitting them means lifting the outer stones.
Steel or Aluminum Edging
Metal edging is thin, strong, and mostly invisible once installed. It works well for both random-fit and cut-stone patterns. Spikes drive through the metal into the compacted base every 12 inches.
Larger Border Stones
Larger stones set at the perimeter can act as their own edge restraint. This works well for random-fit flagstone patterns. The border stones stay in place through their own weight.
Concrete Edge Restraints
Concrete restraints are the most permanent option. They suit high-traffic walkways and areas with active soil movement. Installation adds cost and time compared to metal edging.
How Do You Finish and Seal a Stone Sidewalk?
Finishing includes final compaction, joint activation, and sealing. Each step protects the finished walkway. Skipping any of them shortens the service life significantly.
Final Compaction Pass
Run the plate compactor over the full stone surface. Two passes settle every stone firmly. A protective mat or rubber pad between compactor and stone prevents surface damage on softer materials.
Activating Polymeric Sand
Mist the surface with water to activate polymeric sand. Follow the product instructions for water amount. Too much water washes the binder out; too little leaves the sand loose.
Cleaning the Surface
Sweep away excess polymeric sand or stone dust before moisture reaches it. Leftover dust leaves a permanent haze once wet. A leaf blower clears fine dust from textured stone.
Sealing the Stone
A penetrating sealer protects stone from stains and salt damage. Apply sealer only after joint material has fully cured. Reapply every two to three years for lasting protection.
How Much Does a Stone Sidewalk Cost?
Stone sidewalk cost depends on the stone type, project size, and installation method. Materials alone range from $12 to $40 per square foot. Professional installation adds $15 to $30 per square foot for standard work.
| Cost Component | Range |
|---|---|
| Flagstone materials | $15 to $30 per square foot |
| Bluestone materials | $18 to $35 per square foot |
| Granite materials | $20 to $40 per square foot |
| Limestone materials | $12 to $25 per square foot |
| Slate materials | $15 to $30 per square foot |
| Base materials | $2 to $5 per square foot |
| Professional installation | $15 to $30 per square foot |
| Mortar-set premium | Add 25 to 40 percent |
Total installed cost typically runs $30 to $70 per square foot for a residential stone sidewalk.
What Drives the Final Price
Five factors move a stone sidewalk quote up or down:
- Stone type, from budget limestone to premium granite
- Total square footage of the walkway
- Site prep, including excavation and base depth
- Pattern complexity, with random-fit needing more layout time
- Local labor rates and access conditions
How Long Does a Stone Sidewalk Last?
A properly installed stone sidewalk lasts 40 to 100 years or longer. The stone itself rarely wears out. Joint material and base preparation determine actual service life more than the stone.
Lifespan by Stone Type
Granite lasts 80 to 100 years or more under normal residential use. Bluestone lasts 50 to 80 years in freeze-thaw climates. Flagstone and limestone last 40 to 60 years depending on stone density.
Factors That Shorten Lifespan
Poor base preparation shortens lifespan more than any other single factor. Skipping edge restraints, ignoring drainage, and using the wrong joint material all reduce service life significantly.
Should Stone Sidewalks Be Sealed?
Yes, sealing is recommended for most stone sidewalks. A sealer resists stains, salt damage, and moss growth. Unsealed stone still lasts but weathers faster and stains more easily.
What Are Common Stone Sidewalk Installation Mistakes?
Most stone sidewalk failures trace to a small set of mistakes. Each is preventable with the right sequence and patience.
Skipping Base Depth in Cold Climates
A shallow base heaves within one or two winters. There is no shortcut around proper base depth in freeze-thaw climates.
Setting Stones on Sand Alone
Sand without a compacted crushed stone base cannot support natural stone weight. Stones settle unevenly within a season.
Using the Wrong Joint Material
Regular sand washes out of joints within a season or two. Polymeric sand or mortar resists this. The wrong choice means redoing joints within a year.
Ignoring Drainage Slope
A flat or reverse-sloped walkway traps water. Standing water accelerates freeze heave and base erosion. A quarter-inch drop per foot prevents this.
Mixing Stone Types Without Planning
Combining different stones without a plan looks chaotic. Choose one primary stone and one accent stone at most.
How Do You Maintain a Stone Sidewalk?
Stone maintenance is light compared to concrete. Refresh joint material every few years. Clean and reseal the surface periodically. Good habits now prevent bigger repairs later.
Reapplying Joint Material
Check joints each spring after winter freeze-thaw. Sweep in fresh polymeric sand or stone dust where joints look low. Reactivate polymeric sand with water.
Cleaning and Resealing
Sweep debris and rinse the surface seasonally. A penetrating sealer protects stone from stains and salt damage. Reapply sealer every two to three years.
Winter Care and Salt Avoidance
Avoid rock salt on sealed stone. Salt accelerates surface wear and breaks down sealer. Calcium chloride or sand is a safer winter option.
How Do You Repair a Damaged Stone Sidewalk?
Stone repairs are usually local rather than full replacements. A shifted stone gets lifted and reseated. A cracked stone gets replaced individually. Most small sidewalk repairs take a single afternoon.
Resetting Shifted or Sunken Stones
Lift the affected stone carefully with a pry bar. Add or remove bedding sand to correct the height. Reset the stone and check level.
Replacing Cracked Stones
Remove the cracked stone and clean the opening. Set a replacement stone to match the surrounding pattern. Set it into fresh bedding sand and refill joints.
Re-Leveling After Freeze-Thaw
Frost heave can push stones up unevenly each winter. Spring re-leveling resets what moved. Repeat annual movement points to a base depth problem.
How Do You Choose a Stone Sidewalk Contractor?
Choosing a stone sidewalk contractor starts with licensing and insurance. A hardscape or masonry contractor should carry liability insurance and workers compensation. Ask for references from recent stone projects. The right contractor handles excavation, base prep, and stone-setting together.
Licensing and Insurance Requirements
A hardscape contractor should hold proper local licensing. General liability insurance protects the property owner during work. Workers compensation protects the crew on site.
Questions to Ask Before Hiring
Ask whether the contractor handles base depth calculations. Ask which stone type they recommend for your climate. Ask for a written estimate with base depth and joint material specified.
Ready to Install a Stone Sidewalk?
Rockzen Construction helps NYC property owners complete professional stone sidewalk installation with proper site preparation, base installation, stone placement, leveling, and finishing. Every project starts with a free on-site assessment to determine the right stone and installation approach for your property. You receive a written cost estimate with clear project details and next steps. Most assessments are booked within 48 hours.